Hi Everyone! Feeling that your website is slow and loading takes a long time? That means your website is under-optimized! Did you know that website performance also affects SEO and website ranking on Google? So for that, immediately optimize your WordPress website with the W3 Total Cache plugin. What is W3 Total Cache? How do you install it? How do I combine W3 Total Cache with Memcached? Come on, follow the search for the Support Team below.
What is W3 Total Cache?
W3 Total Cache is a WordPress plugin that functions to optimize the performance of a website. With this plugin, you can manage multiple caches on the server. Unlike Memcached which functions to lighten database load, the combination of Memcached and W3 Total Cache can be a solution for managing a large cache of data in your WordPress .
How to Install W3 Total Cache?
Now you know what W3 Total Cache is. Next, you will explain how to install W3 Total Cache. Oh yes, before installing W3 Total Cache make sure option memcacheand memcachedthe php version is active! It is intended that when the installation is complete, then you can immediately use this W3 Total Cache plugin. If it's not active, then please log in to cPanel. Then, in the search form, please type " php version". Choose Select PHP Version. Please check memcacheand memcached. After that, don't forget to click Save. So that the configuration is saved in the cPanel settings.
As for the steps in installing W3 Total Cache on WordPress, namely,
1. Login to WordPress
Open a wordpress-based website that you have and then add it /wp-admin atau /wp-login behind the domain name. For example www.namadomain.com/wp-admin. Then load it username dan passwordfrom WordPress itself. Then clickLog In

2. Added W3 Total Cache Plugin
After that you will be directed to the website dashboard. Then select Pluginsthe sidebar. Click Add New.

3. Installing the W3 Total Cache Plugin
In the search field write down W3 Total Cachethen enter. Then the plugins you want to install will appear. After that clickInstall Now
. 
Then W3 Total Cache has been installed on your WordPress. To activate this plugin, please klik ActivatePlugin.

4. Enabling the Cache Feature
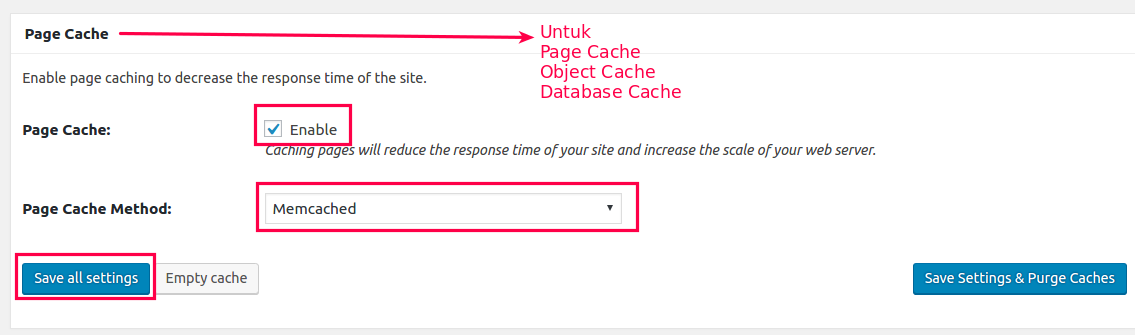
After successful installation of W3 Total Cache, you will find the Menu Performanceon the sidebar (left side). Now Memcached's features are actually very diverse. However, there are 3 features that must be considered. Namely Database Cache, Object Cache and Page Cache . For that you need to activate these three features first. The trick, please click Performanceand then click General Settings. After that, look for the words Page Cache. Then put a check mark on the words "Enable". Then in the Page Cache Method section, please select Memcached. When done, click Save all settings. You must also do the exact same configuration as this in the Object Cacheand Database Cache. Just scroll until you find the words "Object Cache" and "Database Cache" then change them according to the example.
5. Manage Database Cache
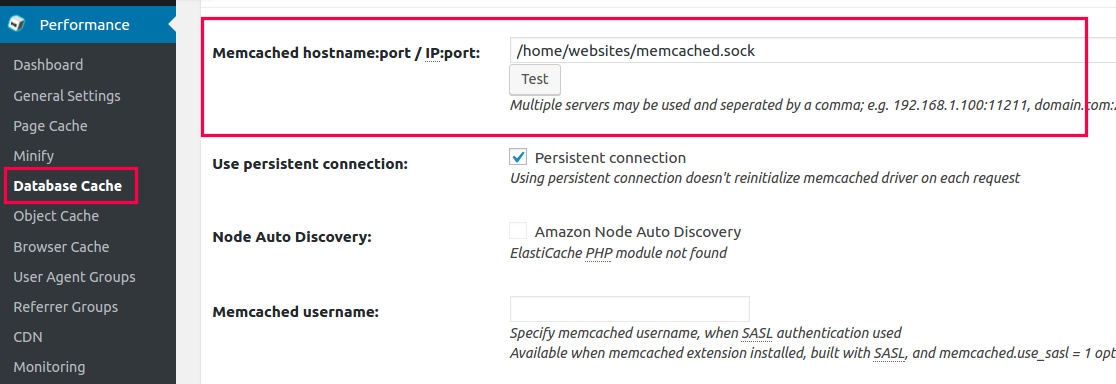
One of the advantages of Memcached is that it can lighten the load of databases. Now the way is, please click Menu Performancethen select Database Cache. In the Memcached hostname: port / IP: port: please fill in the URL when starting memcached earlier. Then click Test. If the Test Passed appears and is green, it means that the Cache Database was successful. Don't forget to click Save all settings.
6. Manage Page Cache
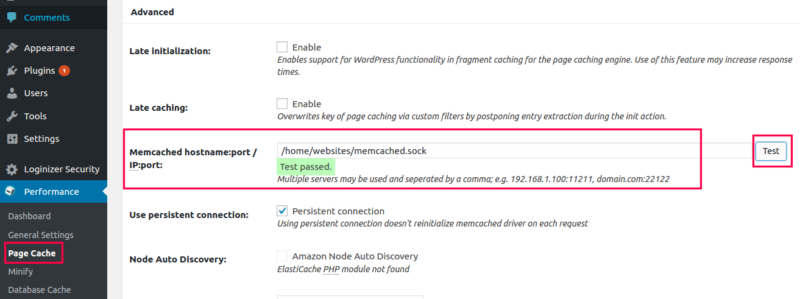
The feature that must be activated is Page Cache. The method is almost the same, namely please click Performancethen click Page Cache. In the Memcached hostname: port / IP: port: please fill in the URL when starting memcached earlier. Then click Test. If the Test Passed appears and is green, it means that the Page Cache is successful. Don't forget to click Save all settings.
7. Manage Object Cache
The third is Object Cache. Please click Performancethen click Object Cache. In the Memcached hostname: port / IP: port: please fill in the URL when starting memcached earlier. Then click Test. If the Test Passed appears and it is green, it means that Object Cache is successful.
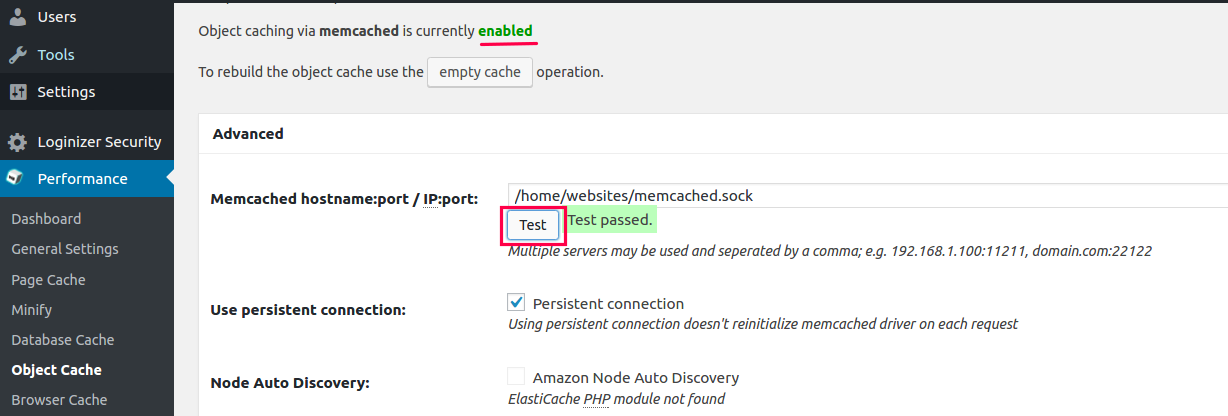
Don't forget to click Save all settings when you finish configuring it 🙂

8. Memcached and W3 Total Cache checks
To find out if the Memcached feature is running or not, please open your WordPress. Then klik kanan kemudian pilih View Page Source. Please, scroll pada bagian bawahit will look like the image below. This means that the W3 Total Cache plugin combined with Memcached has been successfully installed on your WordPress.
Conclusion
How? Now you know what W3 Total Cache is, how to install it and how to combine it with Memcached. W3 Total Cacheis a plugin that functions to optimize the performance of a website. Together with Memcached, this plugin can manage cache on the server as well as lighten database load. Want to enjoy the W3 Total Cache feature? Immediately order cheap hosting with the best features provided by KincaiHosting, such as using SSD, the availability of daily backup and restore features, and a money back guarantee.