Have you ever heard of the word ISO before? For those of you who frequently reinstall, you must be familiar with the word ISO. What is ISO? Quoted from Wikipedia , ISO is a file that contains something that must be stored on an optical disk (CD or DVD) which can be in the form of an OS. On a VPS, you can also add your own ISO, you know! Actually, KincaiHosting has provided various OS that you can use on VPS. Like Ubuntu, CentOS, Debian and Fedora with various versions.
So sometimes there are several ISOs that you want to add to the VPS. For example, you want to add Windows Server ISO and so on. For those of you who want to change the OS on a VPS, please read How to Install an OS on a VPS. Keep in mind that the default operating system in KincaiHosting VPS is usually Unix / Linux based. Why? Try reading 5 Reasons Servers Use Linux . For this reason, this guide will explain how to add ISO on a VPS.
How to Add ISO on VPS
The step by step how to add ISO on a VPS, namely,
1. Login Client Area KincaiHosting
Then enter your username and password. This username and password is the account when you register at KincaiHosting before purchasing a domain or hosting.
2. Choosing a VPS
After that you will be directed to the client area dashboard. In the client area, you can find out what products were purchased. To install OS on VPS, please click Services. In the VM section, please select the VM (VPS) where you want to install the OS.
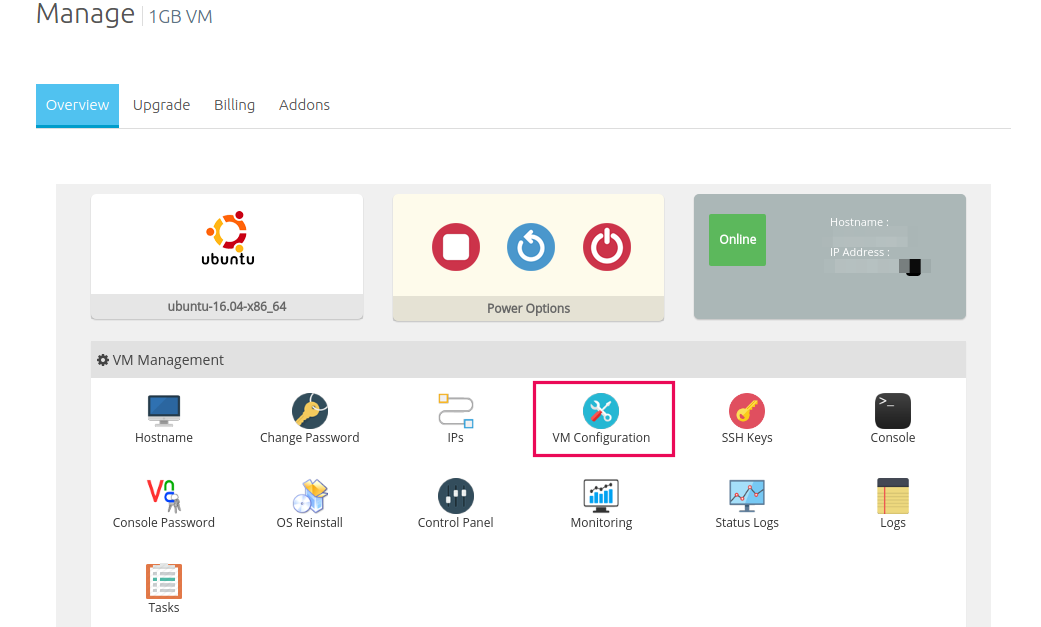
Wait a moment then it will be redirected to the VM dashboard page. Hover over the column VM Managementand select the menu VM Configuration.
4. Adding the OS on the VPS
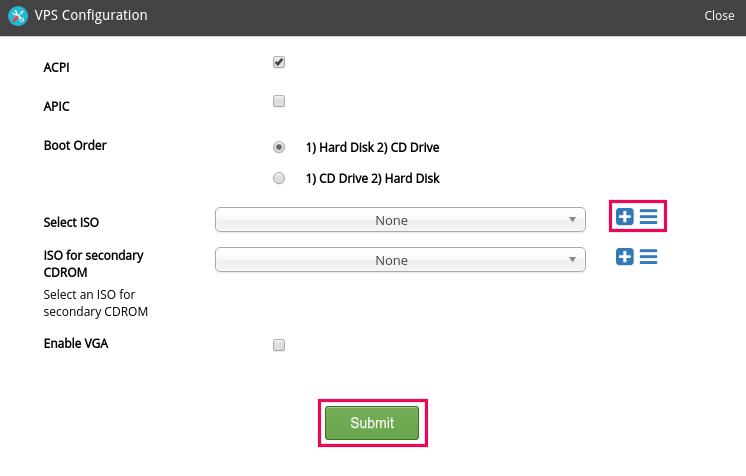
Then you will be directed to the VPS Configuration page. In the section Select ISO, please click " +".
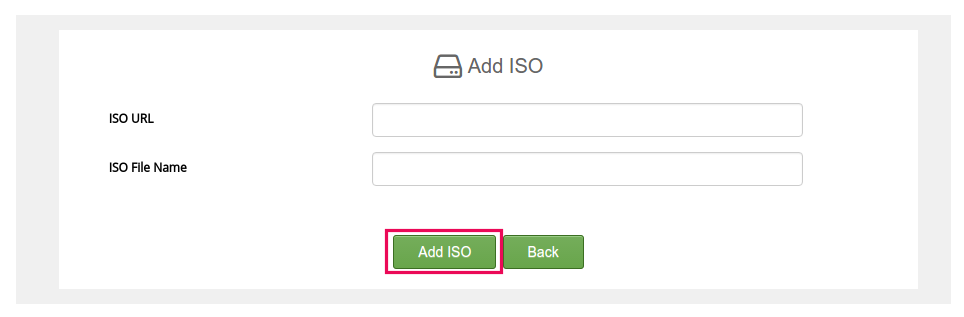
Then add the ISO that has been prepared. The ISO that you can add must be in the form of a URL. So, make sure the ISO you want to add has been uploaded to a storage medium that can be downloaded directly. Then write the name of the ISO file in the section ISO File Name. If so, please click Add ISO.
5. Choosing the OS on the VPS
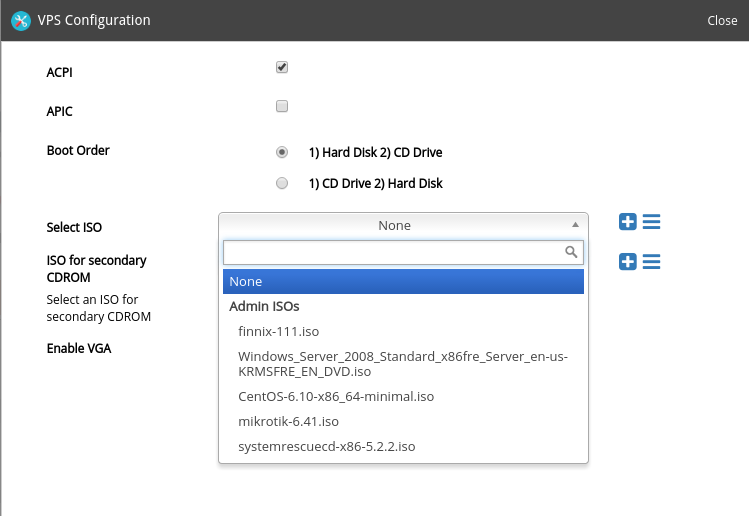
After the OS is added, then you can select the OS in the ISO select section. Choose the ISO you want. Then click Submit.
Conclusion
How to add ISO on a VPS is very easy. KincaiHosting has provided various OS that you can use on VPS. One of the differences between VPS and Hosting lies in the choice of OS used. For more details about the difference between hosting and VPS, please read What is the Difference between VPS and Hosting . On Hosting, you can't choose which operating system to use. Good hosting, usually will use the CloudLinux operating system which has high performance and efficiency. Meanwhile, VPS or so-called Virtual Server, users can use the operating system (OS) that is used as desired. KincaiHosting provides cheap VPS starting from 100,000 per month.
Also Read: How to Easily Remote VPS
